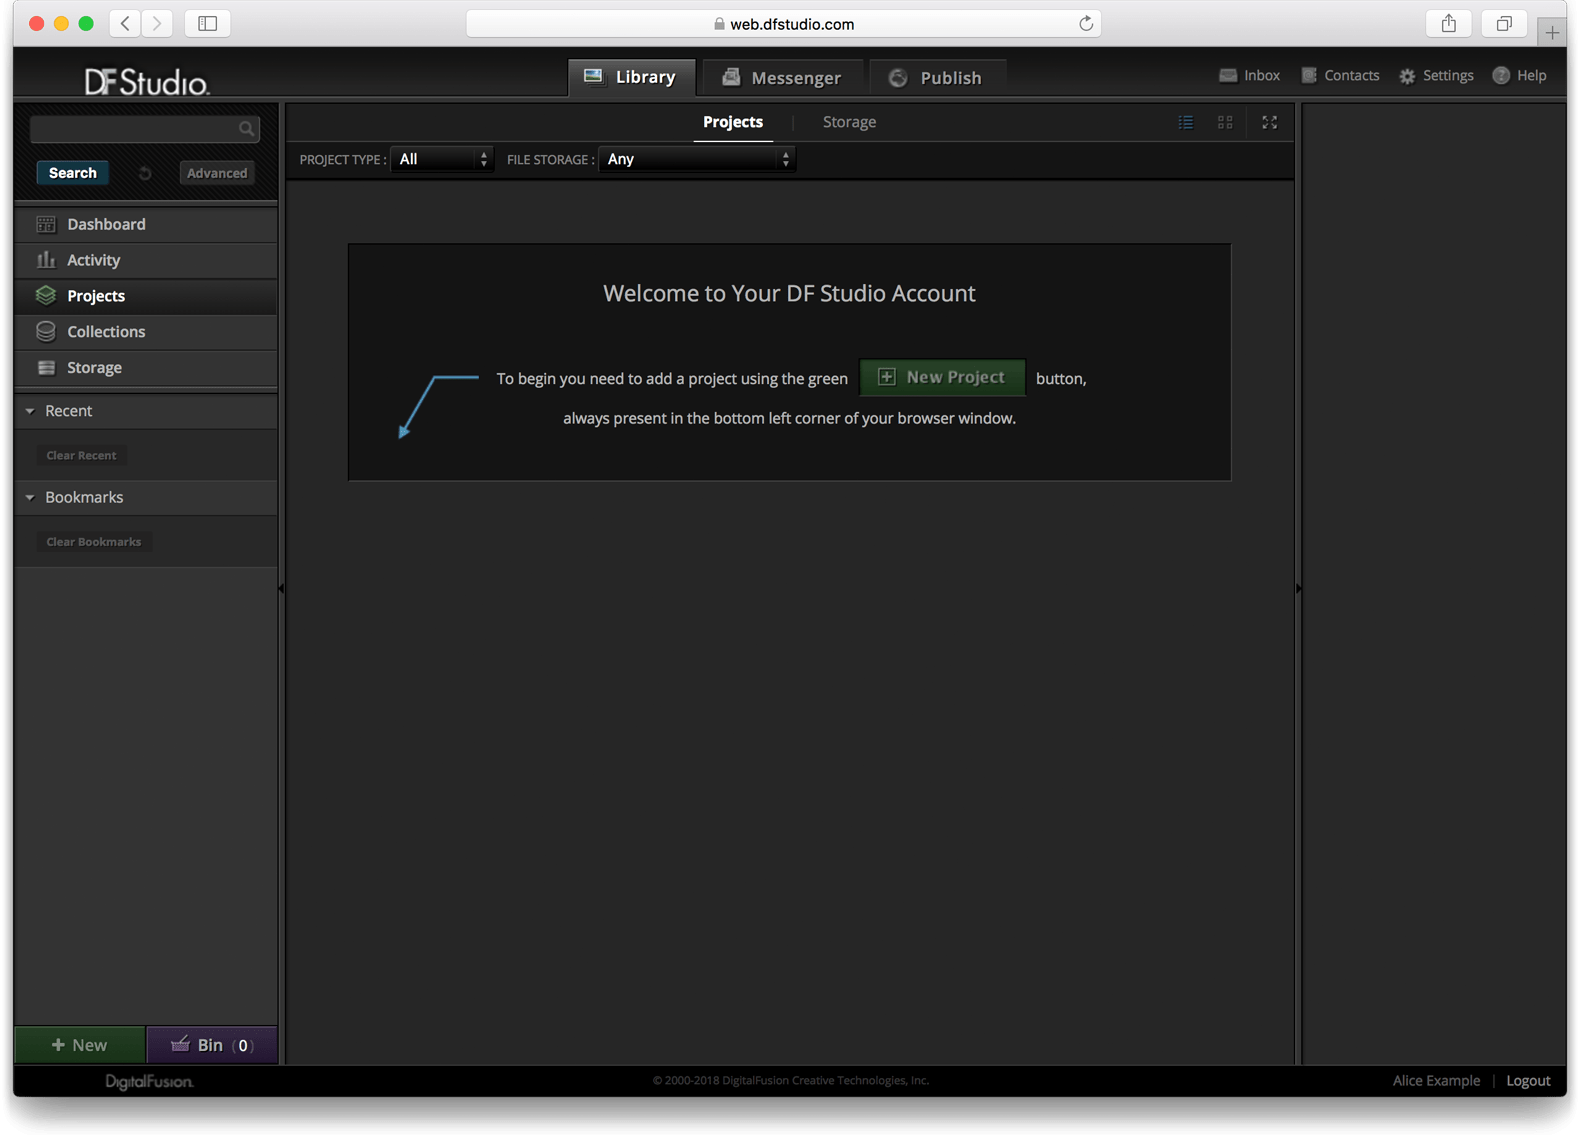
When logging in to a new DF Studio account, the initial screen provides instructions to create a Project.
In DF Studio, a Project is the basic container for a set of images, such as a photo shoot, some scanned images, or any other set of files like video clips, PDF documents, etc. DF Studio accepts all file types, including Microsoft Office files. However, a preview image is only generated for image files and PDFs. All other files will be indicated by the icons associated with their file type.
Upload to a New Project
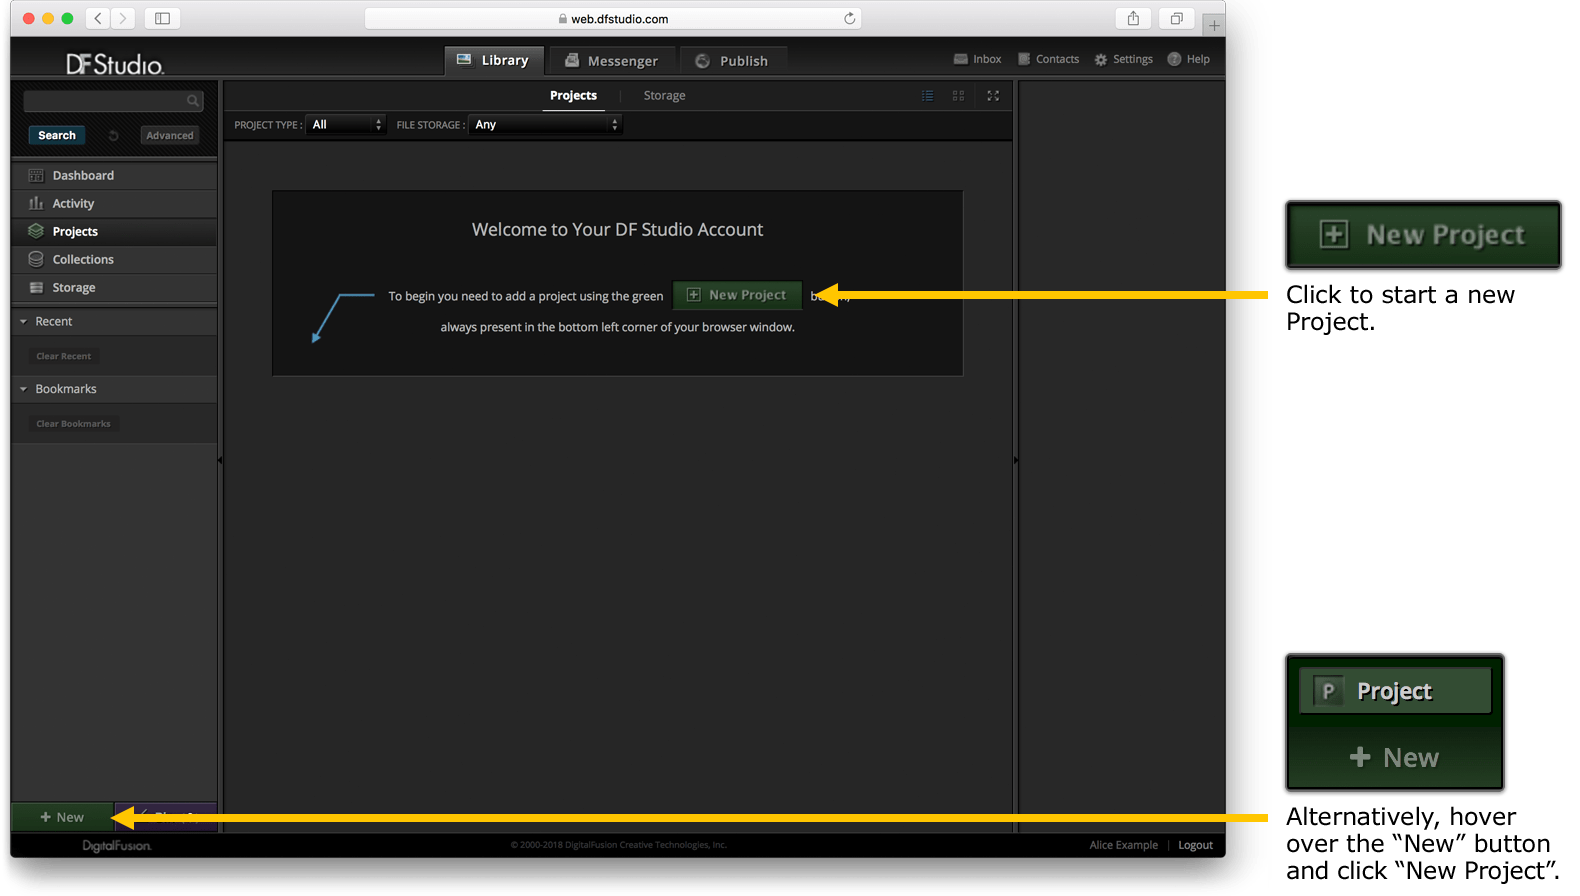
1. Click the green button in the welcome message, or use the green “New” menu, which is always in the lower left corner of the DF Studio interface. Hover the mouse pointer over the “New” button to reveal the menu, then click “Project”.
2. Specify a name for the Project and click “Create Project”.
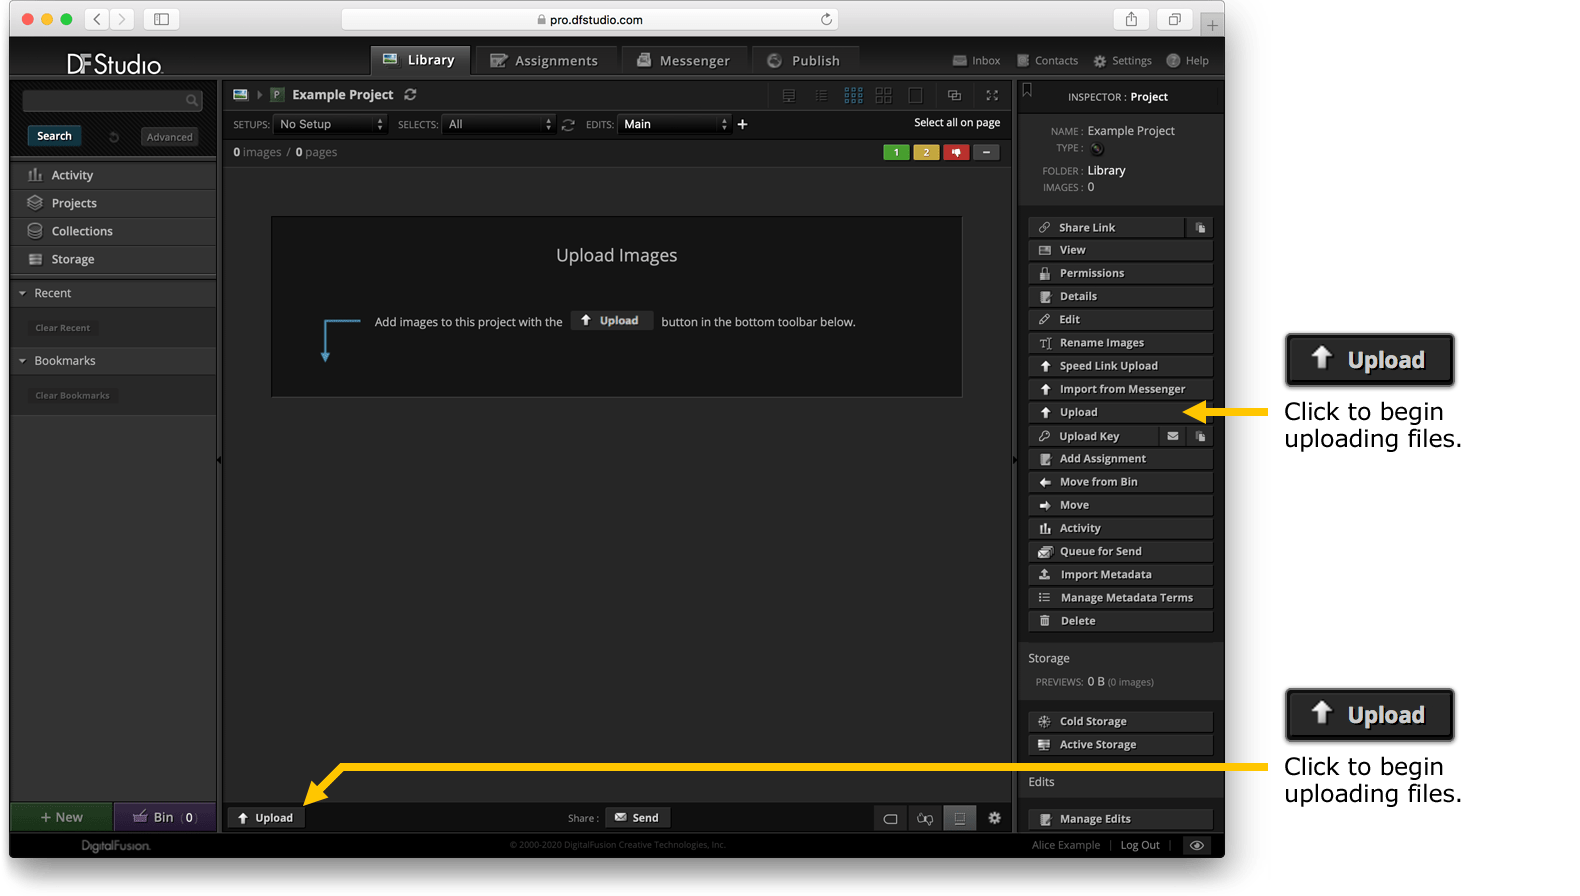
3. While viewing the Project, click the “Upload” button from the Project Inspector to begin an upload. (This button can also be found in the toolbar at the bottom of the workspace area.)
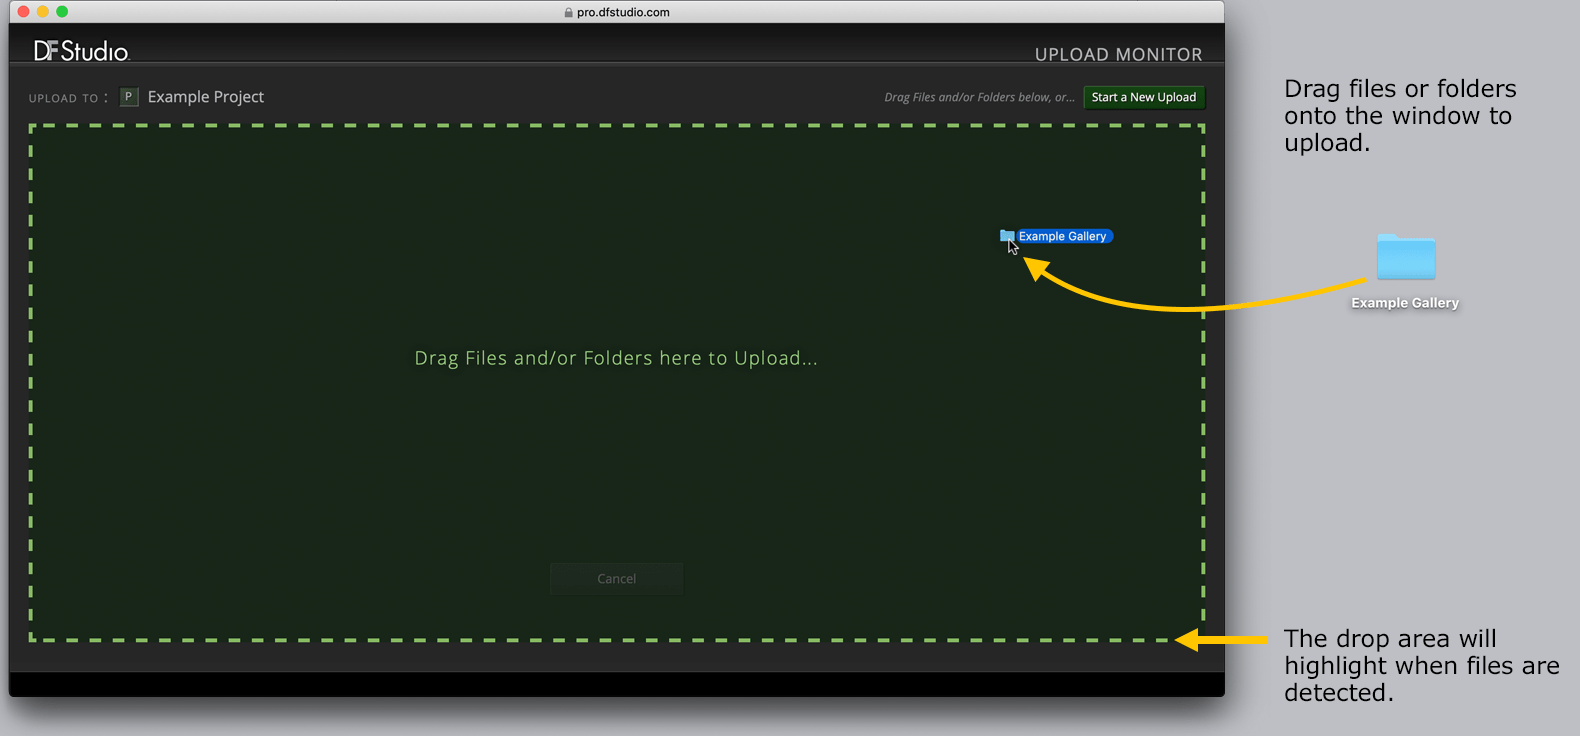
4. An upload window will open with the Project as its designated upload target. Drag and drop files into the window for uploading, or click the “Select Files for Upload” button to browse local files and folders.
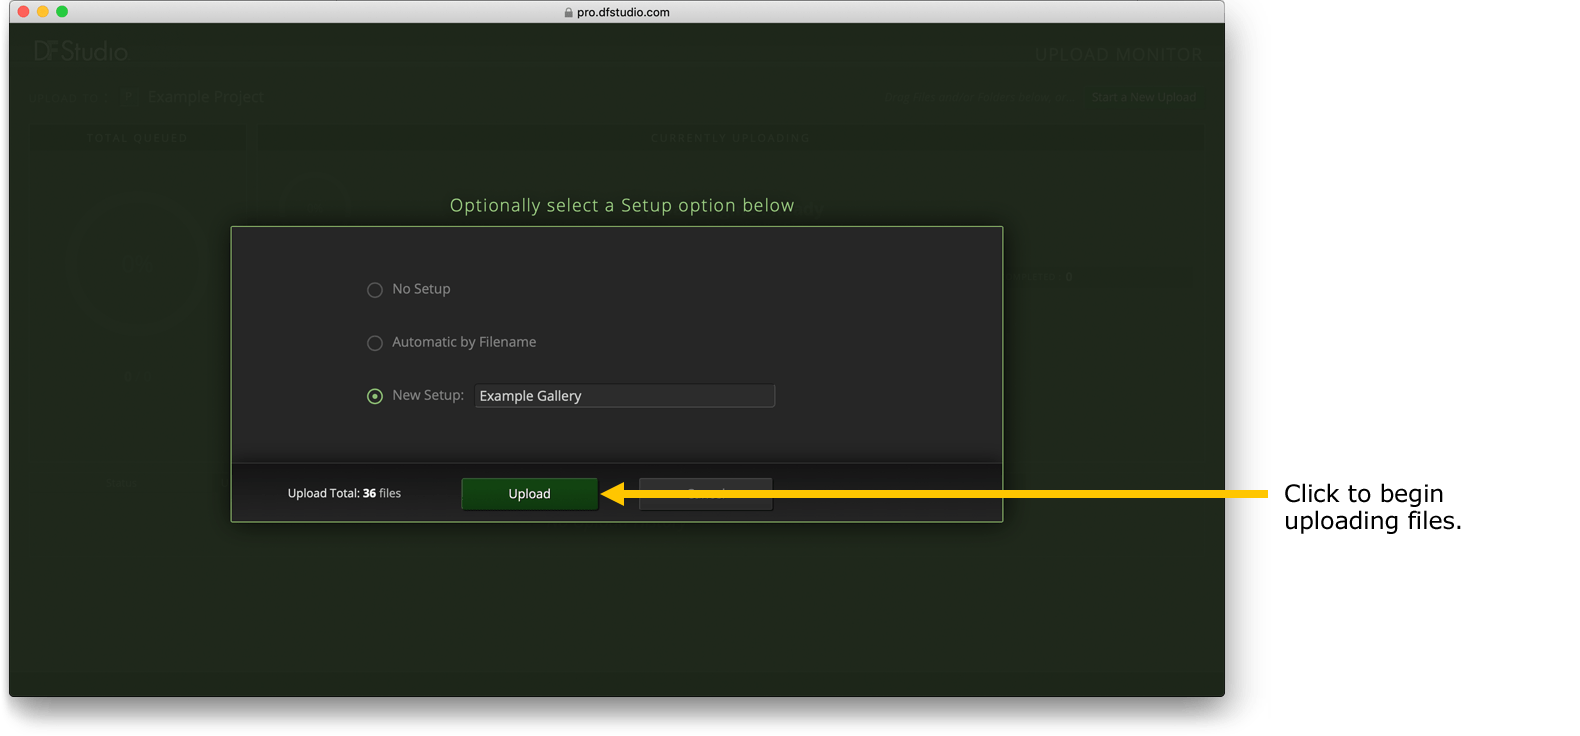
5. Configure the desired Setups in which the new files should be stored (if any), then click the “Upload” button. For additional information, see Upload Files to DF Studio.
As soon as files have been submitted they will begin to upload into the new Project. An upload progress monitor will appear, displaying specific details.
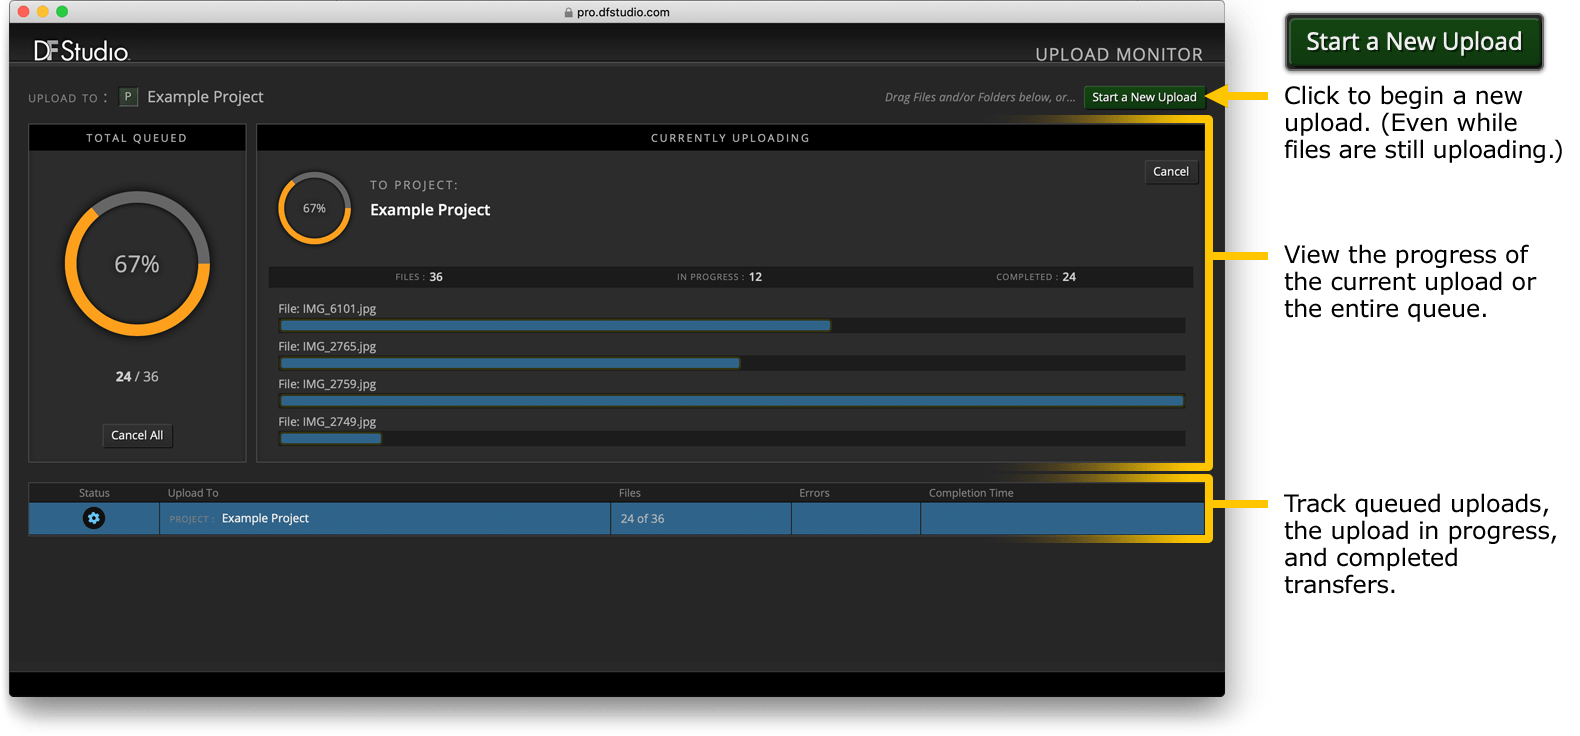
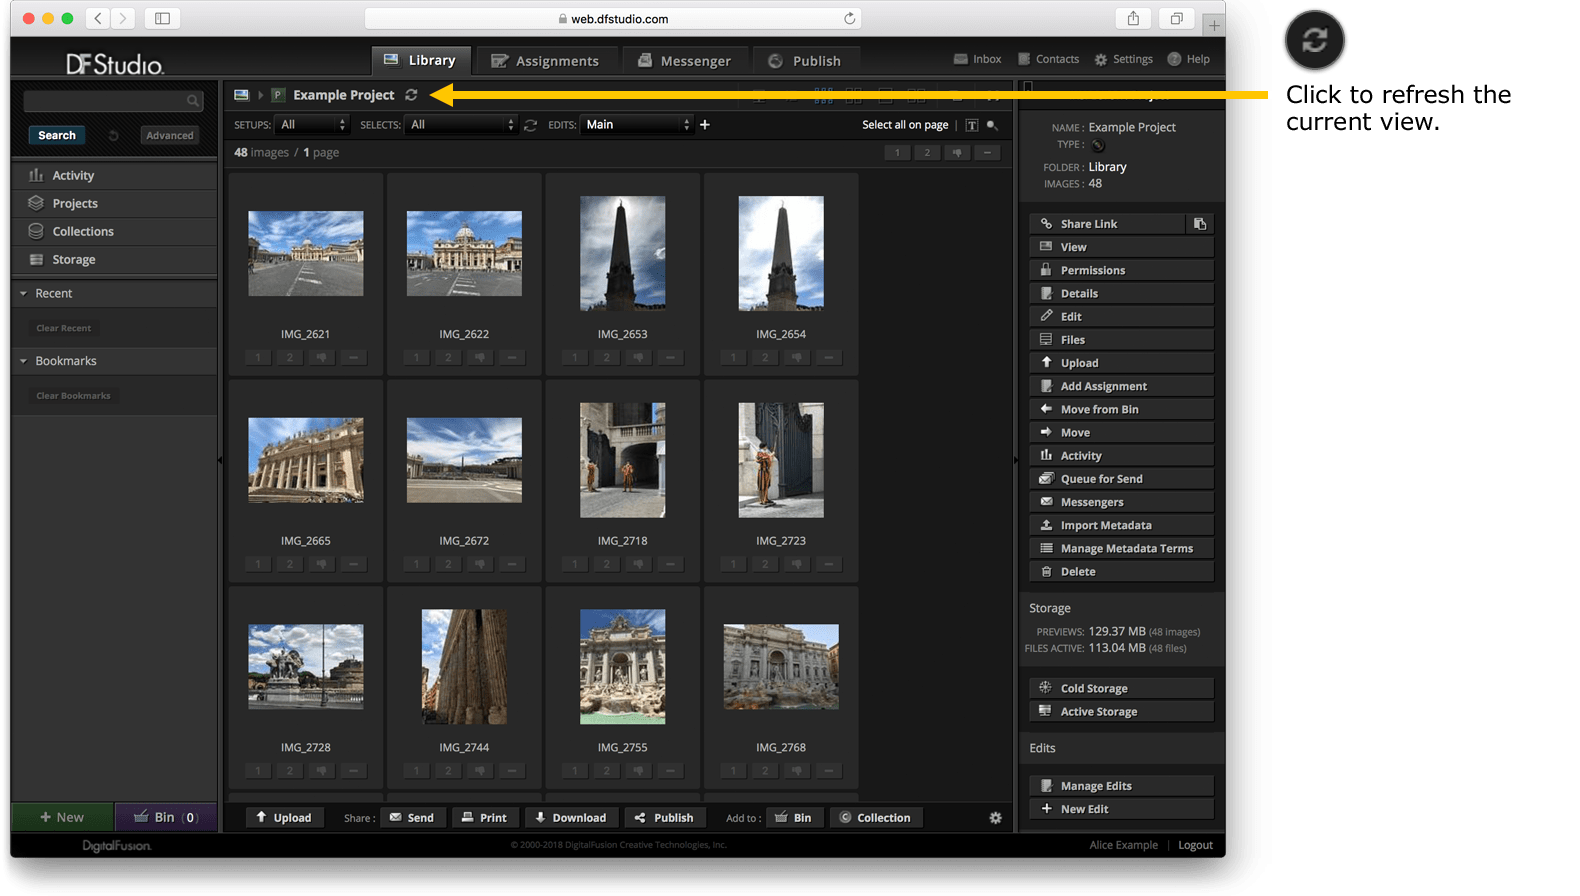
6. Once the upload is complete, the upload window may be closed. Click the refresh icon to view the uploaded images in the Project.
For information about customizing Project metadata, see Manage Project Details.