A Metadata Messenger can be circulated to a recipient in order to collect metadata on an image or series of images. The process for sending a Metadata Messenger is similar to sending any other type of Messenger (see Share Images With a DF Studio Messenger for specific details), with some customized controls that are unique to the metadata entry process.
1. Select a Project, Collection, or group of images to send.
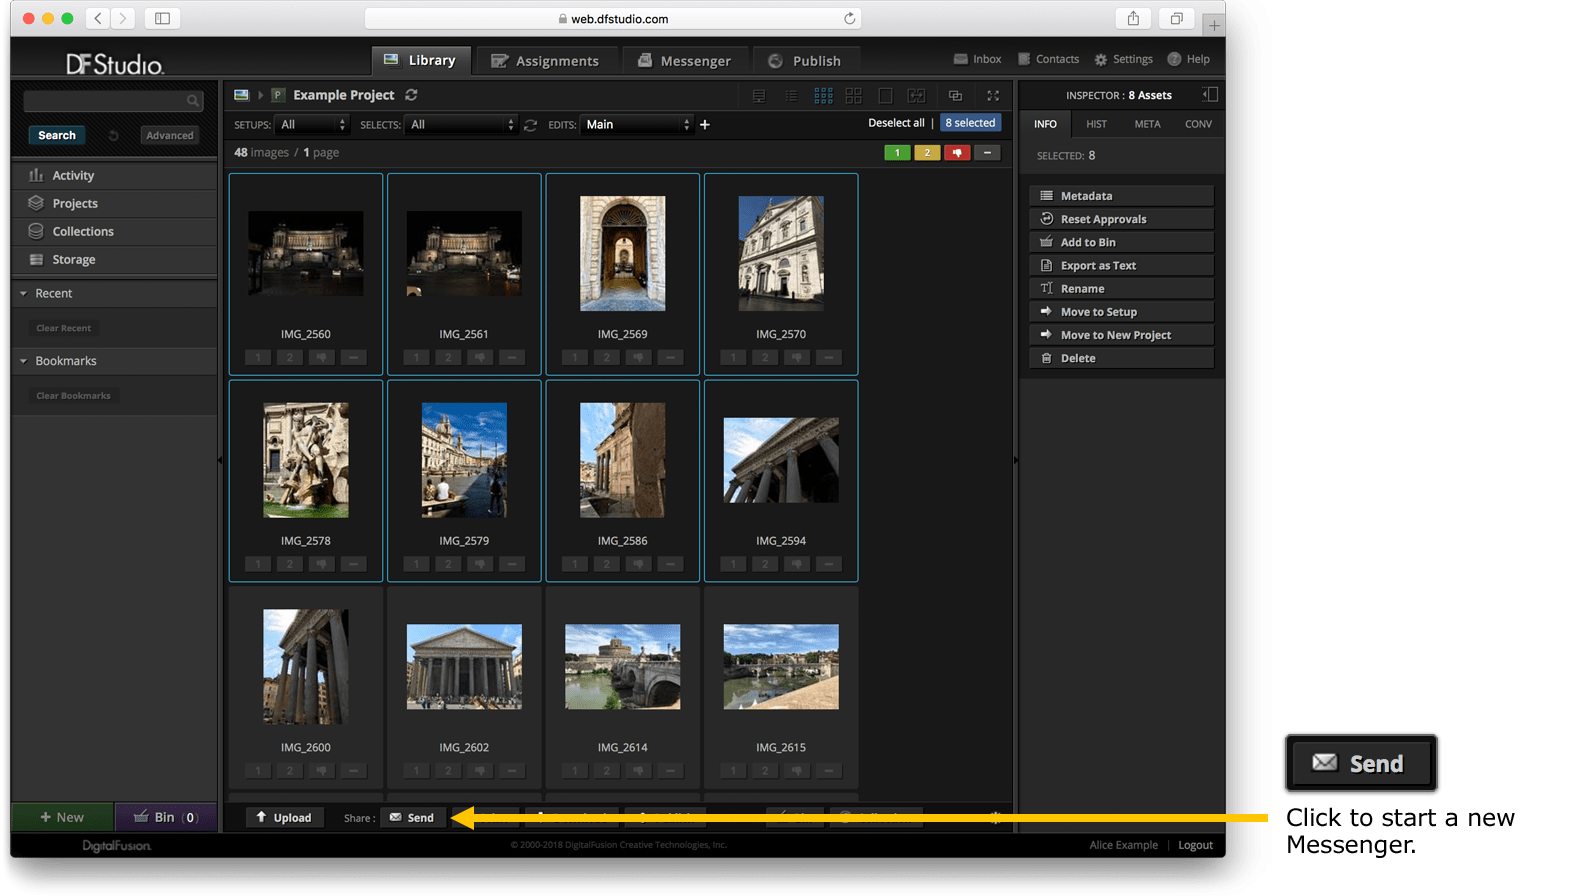
2. Click “Send” in the toolbar at the bottom of the DF Studio interface.
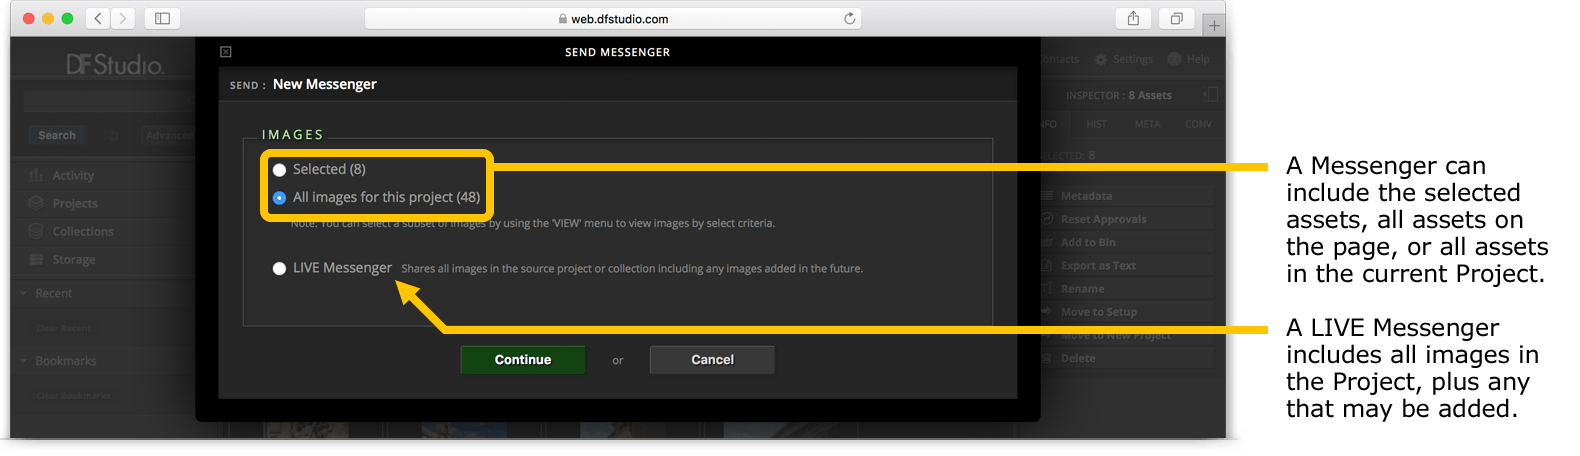
3. In the New Messenger overlay, specify the images to be included, or select LIVE Messenger to include all images currently in the Project or Collection, plus any added in the future. (For more details, see LIVE Messengers Enable Real-Time Collaboration)
4. Enter Messenger details, such as name and expiration date, then choose the “Metadata” template.
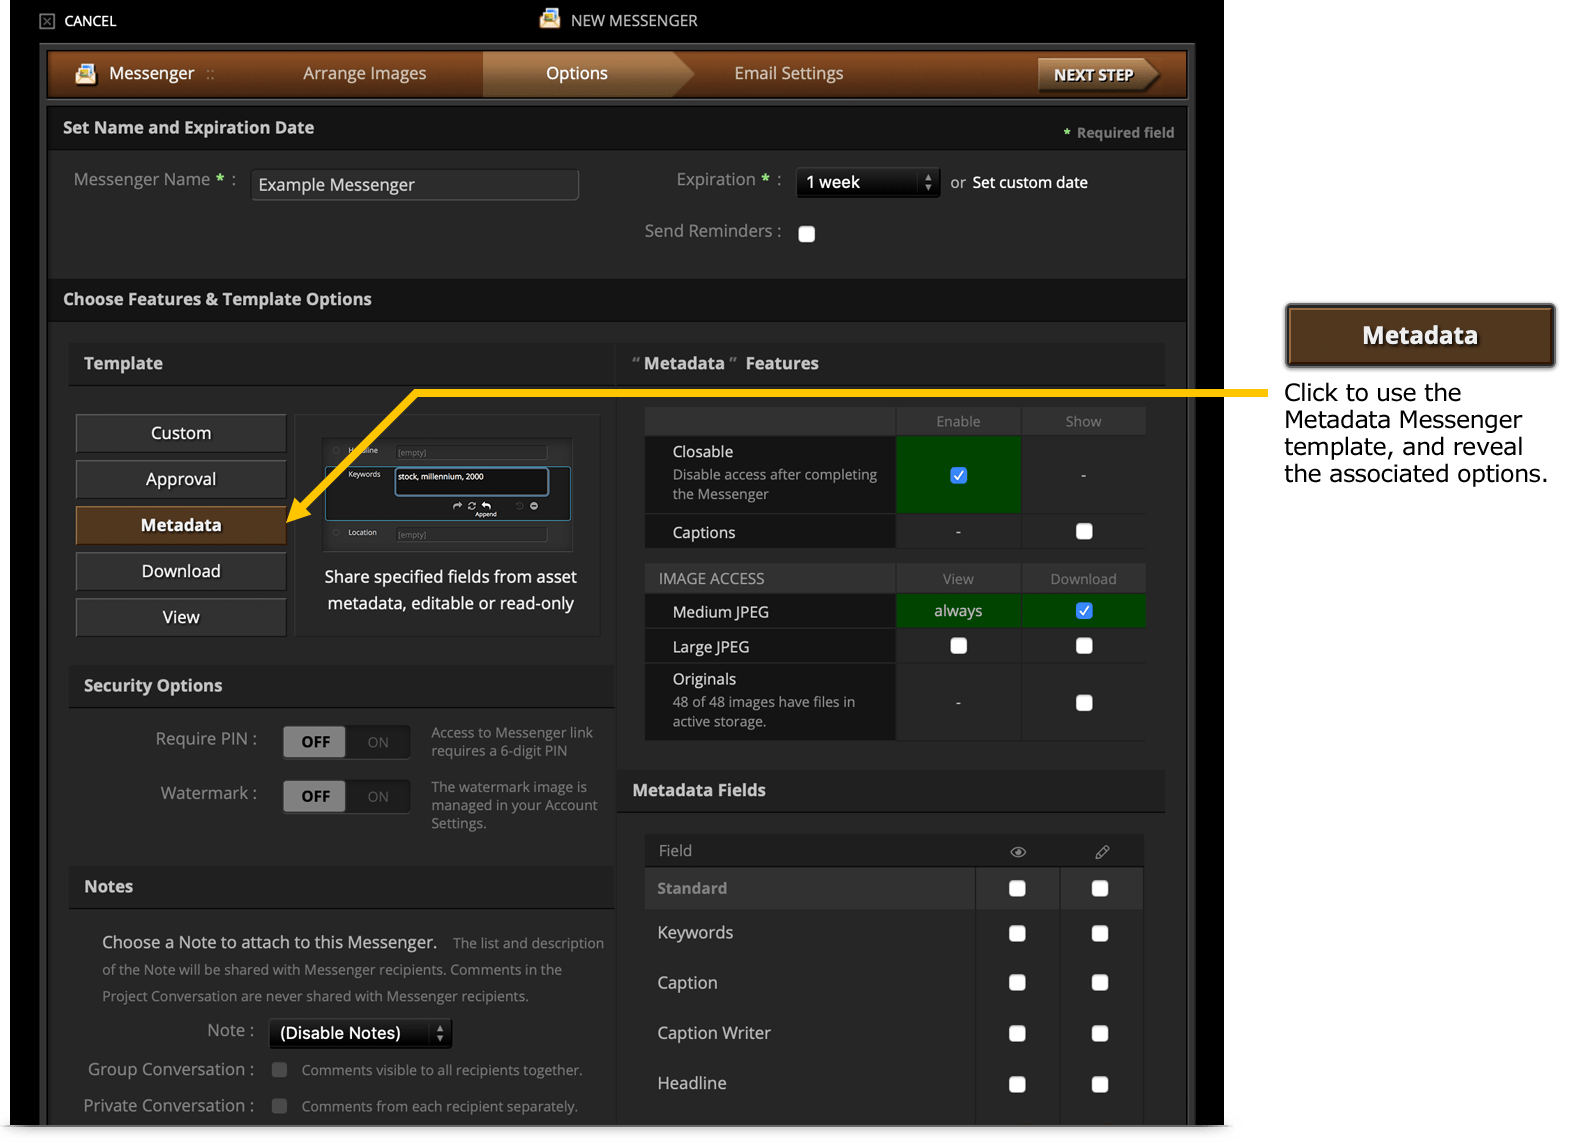
Configure Messenger options regarding security, display, and Notes content as desired. See Messenger Templates and Configuration for further details.
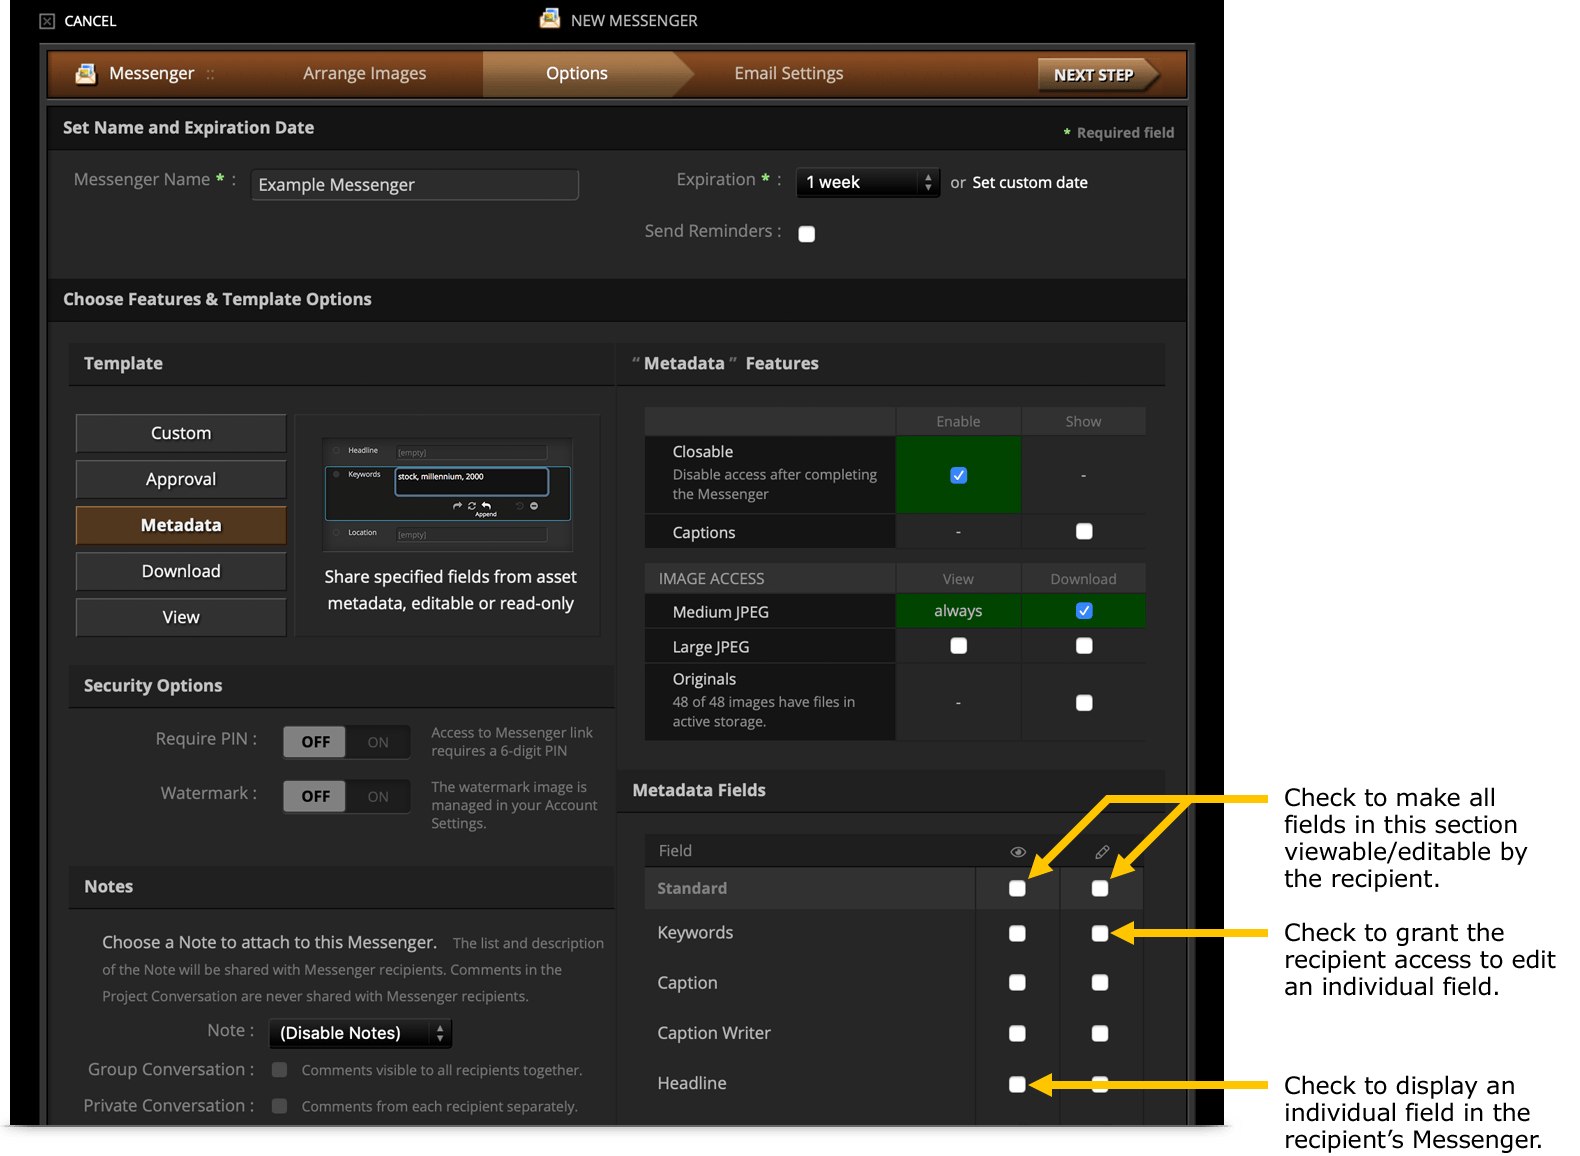
5. Under “Metadata Features”, choose whether to enable Approvals for this Messenger, then specify which metadata fields should be included. Checking the box located in the column with the eye icon header will make that metadata field viewable by recipients, and checking the box located in the column with the pen icon header will allow recipients to edit the metadata in that field. Checking the box in a Group Header (the highlighted rows) will check all of the boxes in its column with one click.
6. When the Metadata Messenger is configured as desired, click “Next Step” to configure the options for distributing the Messenger via email, as outlined in see Share Images With a DF Studio Messenger.